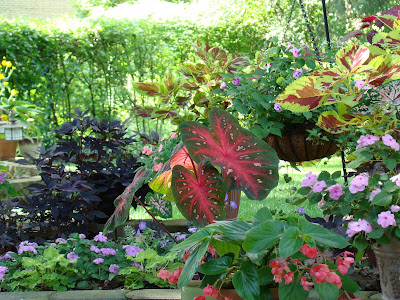
 Variegated Flowering Maple overwintered last year
Okay, so you've decided to overwinter, and maybe even propagate some of your tender plants inside. You've found a good spot to keep your plants, and have a good source of natural or artificial light. You've decided which plants to bring in, and have the supplies you need on hand which may include a quality potting mix, water-tight saucers or trays, nursery pots in various sizes (or more decorative containers if you prefer,) safe insect controls, sharp pruners, Ziploc bags (or more economical generic zip-type bags,) maybe some rooting hormone, and a watering can or hose*. If you don't have nursery pots, clean deli, yogurt, cottage cheese, or other plastic containers will work just fine as long as you make some drain holes in the bottoms. Save the lids and they can be used as saucers!
 Persian Shield, overwintered last year
Individual specimens can be brought inside in the same container they were in while outside. With mixed containers, you'll need to decide whether to bring in the whole thing, or just select individual plants. You could also opt to take only cuttings of certain plants rather than bringing the entire plant indoors. Coleus and Iresine are good candidates and examples. If you opt to break down the container and bring in only certain plants, and cuttings of others, this is where the extra nursery pots or other containers come in, and they can also be used for propagating later, after your plants are already inside. If you're transferring a plant into a new pot, be sure to choose one that allows room for some root growth while not being too big. An extra inch or two larger than the root ball is probably about right. Too small and the plant will get rootbound, too large and it may rot.
For starting cuttings, choose containers with room for root growth, but not too big. I start cuttings in 4" square or 4 1/2" round nursery pots. Some things will be fine over the winter in their starter pots, others may need to be bumped up to something larger over the winter. Watch for roots beginning to come out the bottom of the container before moving to a larger one. I bump up incrementally - from a 4 1/2" to a 6" for example, later to a gallon if necessary. Making too big a jump in pot size can be an invitation to rot, fungus, and bugs.
 Coleus started from a cutting
You can opt to leave blooms and buds on your plants when you bring them in. I find it's less trouble to remove the blooms and buds before bringing plants indoors. Except plants I plan to propagate, I cut most plants back before bringing them inside, removing buds and blooms, and any yellowing, dead, or damaged foliage. I clean the soil surface of any debris. Cutting them back reduces watering, encourages fuller branching, and prevents plants from getting overgrown, spindly, or sprawling during the shorter, darker days of winter. Good hygiene will help keep your overwintering plants healthy. New Dragon Wing Begonia will be overwintered this year.
Propagating tender plants from cuttings is a fun, cheap winter pastime, easier with some plants, more challenging with others. Coleus, brugmansia, datura, all varieties of impatiens, heliotropes, iresine, some begonias, fuchsias, and sweet potato vines are all examples of plants easy to start in ordinary potting mix, or even water in the case of some of these. Don't be afraid to experiment - it's a fun learning experience. Sweet potato vines can easily be started by cutting and replanting pieces of the tubers - just make sure each piece has at least one eye. Iresine started from a cutting
To start new plants from cuttings, choose healthy stems 3-5 inches long with several leaf nodes. Begin by filling your pots with a good-quality soilless (sterile) potting mix. Water the mix and allow it to drain. Make a clean diagonal cut at the base of the stem. The diagonal increases the surface area of the cut and allows better uptake of water while the roots are forming, increasing your success rate. Snap off or cut the foliage away from the bottom two or three nodes. Cutting larger leaves in half will often reduce wilting of the foliage before roots begin forming.
Rooting hormone accelerates the rooting process and increases rooting success rates. If you opt to use it, first wet the stem up to the top stripped leaf node, then coat that part of the stem with rooting hormone. Next, use a pencil, bamboo stake, or even a screwdriver to make a hole in the potting mix deep enough to insert the cutting so soil covers the topmost stripped leaf node. Insert the cutting, making sure the stripped nodes are below soil level. Gently water, making sure the soil makes good contact with the stem of your cutting. Remove or trim any foliage making direct soil contact. Place your cuttings in a warm area out of direct artificial light or sunlight, and keep the soil evenly moist. Brugmansia started from a cutting last winter is 4' tall. Notice the buds?
Some wilting of your cuttings may occur. Watch them carefully the first several days. Misting several times a day will help keep the foliage hydrated as the cutting is forming roots. If your cutting is wilting, easier than misting is making a mini-greenhouse for it by zipping an appropriately-sized Ziploc bag tightly around the rim of the pot. A little fresh air is fine, but after a few hours you should see some condensation on the inside of the bag. If not either your cutting needs a bit more watering, or your bag needs to be sealed a little tighter. A gallon-size bag seems to work best for me. In most cases they're big enough to allow breathing space for the foliage. The bags can be reused many times. A bamboo stake or two, broken or cut to an appropriate size and inserted in the perimeter of the pot will keep the plastic from direct contact with the foliage, keeping it healthier. The humidity inside the bag will help keep the foliage hydrated during the rooting process, increasing your success rate, and speed the rooting process.
You probably won't have to water the cutting at all while the bag is in place. After a couple of weeks, you can check for root development by giving a very gentle pull to your cutting. If you encounter resistance, your cutting is probably already rooting. Once the roots begin to form the bag can be removed. As the cutting grows, you can pinch it to encourage fuller branching if you wish. Re-pot it into a slightly larger container if the roots start coming through the drain holes before it's time to plant it outside.
In the spring, after the danger of frost is past, you can begin moving your plants back outside. They'll need to be hardened off for a few days in a shady, sheltered spot before planting them in their new summer home. You can start this process a bit earlier by putting them outside during the day and bringing them back in if the temps dip too low. (That's too much work for me - I'd rather wait until the weather's a bit more settled. Once they're back outside, I want to be done schlepping them!)
Because they're used to being sheltered indoors, high winds, direct sunlight, or temperatures below 45-50 degrees could spell disaster without an adequate hardening off period, so be patient and take your time with this step. I learned that the hard way with a variegated begonia hanging basket and several Diamond Frost euphorbias I overwintered last year. I put them outside on a day that turned out to be chillier and windier than I'd expected. By the time I got home from work that day, these poor plants that I'd tended all winter had been mercilessly whipped by the wind and were virtually defoliated. They did recover quickly and have been beautiful all summer, but they looked pretty awful their first couple of weeks outside. My husband kept offering to buy new baskets from the nursery, they looked so pathetic. I was confident they'd recover with a little patience and TLC, and they did.  The variegated begonia, recovered
Rose, I hope these posts helped motivate you to try overwintering a few tender plants inside this winter, and maybe even encouraged you to try starting a new plant or two from cuttings! I hope I didn't make it sound too complicated - it's really very easy, fun, and a satisfying way to stretch your gardening budget!
Any and all suggestions for starting plants from cuttings or overwintering tender plants are very welcome - I'm pretty new at this, and still have plenty to learn!
*In an unfinished basement with a concrete floor, a hose can be connected to the utility sink faucet, making watering less of a chore if you're overwintering a lot of plants. Water carefully to avoid splashing and puddling. Wet conditions may encourage bugs.

 Variegated Flowering Maple overwintered last year
 Persian Shield, overwintered last year
 Coleus started from a cutting
 Iresine started from a cutting


 This is a look into the forest as we climb the steep private road to the mountain top.


