Showing posts with label overwintering annual and tropical plants. Show all posts

Sunday, September 28, 2008

Overwintering Tender Plants, Part III

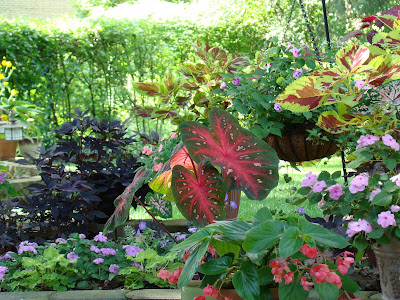
Variegated Flowering Maple overwintered last year

Okay, so you've decided to overwinter, and maybe even propagate some of your tender plants inside. You've found a good spot to keep your plants, and have a good source of natural or artificial light. You've decided which plants to bring in, and have the supplies you need on hand which may include a quality potting mix, water-tight saucers or trays, nursery pots in various sizes (or more decorative containers if you prefer,) safe insect controls, sharp pruners, Ziploc bags (or more economical generic zip-type bags,) maybe some rooting hormone, and a watering can or hose*. If you don't have nursery pots, clean deli, yogurt, cottage cheese, or other plastic containers will work just fine as long as you make some drain holes in the bottoms. Save the lids and they can be used as saucers! Persian Shield, overwintered last year

Individual specimens can be brought inside in the same container they were in while outside. With mixed containers, you'll need to decide whether to bring in the whole thing, or just select individual plants. You could also opt to take only cuttings of certain plants rather than bringing the entire plant indoors. Coleus and Iresine are good candidates and examples. If you opt to break down the container and bring in only certain plants, and cuttings of others, this is where the extra nursery pots or other containers come in, and they can also be used for propagating later, after your plants are already inside. If you're transferring a plant into a new pot, be sure to choose one that allows room for some root growth while not being too big. An extra inch or two larger than the root ball is probably about right. Too small and the plant will get rootbound, too large and it may rot.


For starting cuttings, choose containers with room for root growth, but not too big. I start cuttings in 4" square or 4 1/2" round nursery pots. Some things will be fine over the winter in their starter pots, others may need to be bumped up to something larger over the winter. Watch for roots beginning to come out the bottom of the container before moving to a larger one. I bump up incrementally - from a 4 1/2" to a 6" for example, later to a gallon if necessary. Making too big a jump in pot size can be an invitation to rot, fungus, and bugs.

Coleus started from a cutting

You can opt to leave blooms and buds on your plants when you bring them in. I find it's less trouble to remove the blooms and buds before bringing plants indoors. Except plants I plan to propagate, I cut most plants back before bringing them inside, removing buds and blooms, and any yellowing, dead, or damaged foliage. I clean the soil surface of any debris. Cutting them back reduces watering, encourages fuller branching, and prevents plants from getting overgrown, spindly, or sprawling during the shorter, darker days of winter. Good hygiene will help keep your overwintering plants healthy.New Dragon Wing Begonia will be overwintered this year.

Propagating tender plants from cuttings is a fun, cheap winter pastime, easier with some plants, more challenging with others. Coleus, brugmansia, datura, all varieties of impatiens, heliotropes, iresine, some begonias, fuchsias, and sweet potato vines are all examples of plants easy to start in ordinary potting mix, or even water in the case of some of these. Don't be afraid to experiment - it's a fun learning experience. Sweet potato vines can easily be started by cutting and replanting pieces of the tubers - just make sure each piece has at least one eye. Iresine started from a cutting

To start new plants from cuttings, choose healthy stems 3-5 inches long with several leaf nodes. Begin by filling your pots with a good-quality soilless (sterile) potting mix. Water the mix and allow it to drain. Make a clean diagonal cut at the base of the stem. The diagonal increases the surface area of the cut and allows better uptake of water while the roots are forming, increasing your success rate. Snap off or cut the foliage away from the bottom two or three nodes. Cutting larger leaves in half will often reduce wilting of the foliage before roots begin forming.

Rooting hormone accelerates the rooting process and increases rooting success rates. If you opt to use it, first wet the stem up to the top stripped leaf node, then coat that part of the stem with rooting hormone. Next, use a pencil, bamboo stake, or even a screwdriver to make a hole in the potting mix deep enough to insert the cutting so soil covers the topmost stripped leaf node. Insert the cutting, making sure the stripped nodes are below soil level. Gently water, making sure the soil makes good contact with the stem of your cutting. Remove or trim any foliage making direct soil contact. Place your cuttings in a warm area out of direct artificial light or sunlight, and keep the soil evenly moist. Brugmansia started from a cutting last winter is 4' tall. Notice the buds?

Some wilting of your cuttings may occur. Watch them carefully the first several days. Misting several times a day will help keep the foliage hydrated as the cutting is forming roots. If your cutting is wilting, easier than misting is making a mini-greenhouse for it by zipping an appropriately-sized Ziploc bag tightly around the rim of the pot. A little fresh air is fine, but after a few hours you should see some condensation on the inside of the bag. If not either your cutting needs a bit more watering, or your bag needs to be sealed a little tighter. A gallon-size bag seems to work best for me. In most cases they're big enough to allow breathing space for the foliage. The bags can be reused many times. A bamboo stake or two, broken or cut to an appropriate size and inserted in the perimeter of the pot will keep the plastic from direct contact with the foliage, keeping it healthier. The humidity inside the bag will help keep the foliage hydrated during the rooting process, increasing your success rate, and speed the rooting process.

You probably won't have to water the cutting at all while the bag is in place. After a couple of weeks, you can check for root development by giving a very gentle pull to your cutting. If you encounter resistance, your cutting is probably already rooting. Once the roots begin to form the bag can be removed. As the cutting grows, you can pinch it to encourage fuller branching if you wish. Re-pot it into a slightly larger container if the roots start coming through the drain holes before it's time to plant it outside.

In the spring, after the danger of frost is past, you can begin moving your plants back outside. They'll need to be hardened off for a few days in a shady, sheltered spot before planting them in their new summer home. You can start this process a bit earlier by putting them outside during the day and bringing them back in if the temps dip too low. (That's too much work for me - I'd rather wait until the weather's a bit more settled. Once they're back outside, I want to be done schlepping them!)

Because they're used to being sheltered indoors, high winds, direct sunlight, or temperatures below 45-50 degrees could spell disaster without an adequate hardening off period, so be patient and take your time with this step. I learned that the hard way with a variegated begonia hanging basket and several Diamond Frost euphorbias I overwintered last year. I put them outside on a day that turned out to be chillier and windier than I'd expected. By the time I got home from work that day, these poor plants that I'd tended all winter had been mercilessly whipped by the wind and were virtually defoliated. They did recover quickly and have been beautiful all summer, but they looked pretty awful their first couple of weeks outside. My husband kept offering to buy new baskets from the nursery, they looked so pathetic. I was confident they'd recover with a little patience and TLC, and they did. The variegated begonia, recovered


Rose, I hope these posts helped motivate you to try overwintering a few tender plants inside this winter, and maybe even encouraged you to try starting a new plant or two from cuttings! I hope I didn't make it sound too complicated - it's really very easy, fun, and a satisfying way to stretch your gardening budget!

Any and all suggestions for starting plants from cuttings or overwintering tender plants are very welcome - I'm pretty new at this, and still have plenty to learn!


*In an unfinished basement with a concrete floor, a hose can be connected to the utility sink faucet, making watering less of a chore if you're overwintering a lot of plants. Water carefully to avoid splashing and puddling. Wet conditions may encourage bugs.
Friday, September 26, 2008

Overwintering Tender Plants, Part II

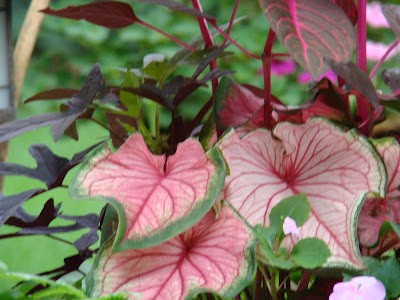
an overwintered caladium


In my experience, plants that overwinter well indoors are mostly tender perennials, bulbs, tubers, and shrubs often treated as annuals in climates where they're not hardy. These include many begonia varieties, heliotropes, fuchsias, caladiums, elephant ears, angel's trumpet, tropical hibiscus, jasmine, flowering maple, tender ivies and vincas, Diamond Frost euphorbia, dahlias, ornamental sweet potatoes, cannas, calla lilies, and too many more to list.

The first step when considering whether, or how to overwinter the many tender container plants here was planning. With mostly hardwood floors, due to the number of plants I wanted to bring in, I was reluctant to overwinter most things in our living space. So last fall well before the date of our first average frost, I splurged on a large sodium grow light for the basement. Grow lights come in different sizes depending upon the size of the space you wish to illuminate. This was an expensive and carefully-considered investment I plan to use for years to come. It was far less costly than building and heating a greenhouse or sunroom. (Not that I'd mind having either or both of those, but they're not in the budget anytime soon.)We have an unfinished basement - a good spot to install the light. It paid for itself the first season because of all the plants I conserved and propagated. For you, it will depend upon your budget, how many plants you want to save and/or propagate, whether you have a greenhouse, sunroom, or other space with enough natural light and floors conducive to indoor gardening, or whether you have a space in your home, such as an extra bedroom or a basement, where installing a grow light would work. Artificial lighting isn't necessary of course - sunny south or west-facing windows are great for all but the least sun-tolerant plants, while north and east exposure windows will be fine for the shade lovers. Protect windowsills and/or floors from water damage with non-porous saucers, and water carefully to avoid spills, leaks, and splashes.

Many plants can be allowed to go dormant and overwintered in an attached garage with only minimal watering - once a month or so will suffice for most plants. This works well especially with tender shrubs and tubers, and even some potted trees, as long as the temps in your attached garage don't go below the plant's minimum requirements. Since I've never kept a thermometer in the garage or determined how warm it stays on the coldest of the cold winter days, and since our garage is already pretty overstuffed, I decided to stick with the basement for now.

Our grow light costs about $10/month to run, and a replacement bulb costs around $100. In my case this means after my initial purchase I still save considerable money on plants in the spring, especially since I also use the light for propagating, seed starting, and overwintering perennial and shrub cuttings started in the fall whose root systems otherwise might not be mature enough to survive our harsh winters. Our sodium light is good for an 8' x 10' space, which I managed to fill with no problem.The light assembly is installed on hooks screwed into the exposed joists of our unfinished basement. It's suspended from adjustable cables for raising and lowering, and is plugged into a separate ballast unit, which is raised off the floor to prevent damage from the seepage we sometimes have in our basement following heavy rains (such as the one we just experienced when the remnants of Hurricane Ike blew through our area recently.)

Whether to purchase a grow light is part of the planning. You'll also want to consider which plants to overwinter. Some annuals are truly annuals, are easy, quick, and inexpensive to start from seed, and don't overwinter well anyway. Others, such as those listed above will usually be even larger and more beautiful, and bloom more their second, and even subsequent seasons if conserved over the winter. In my experience, caladiums have been an exception. They survived just fine, but were smaller and had less foliage their second season. I'm saving them again this year anyway. I did find that a good organic bulb fertilizer helped jump-start them, increasing their fullness and initially-disapointing foliage size. Even so, the new ones were still larger. Mixing some new bulbs with some overwintered ones was a good strategy for me. Since they went mostly dormant anyway after bringing them in, this year I may not bother putting them under the light, and will reduce watering. Maybe if they go fully dormant over the winter they'll come back a little stronger next year.

Coleus and double impatiens don't seem to be all that great either in a second season, but cuttings are easily rooted and grow fast. Just one plant can yield quite a few cuttings. Timing is important - I started the coleus cuttings early enough, but didn't think to start the impatiens until April. They were still pretty small by mid-May, so I did buy more double impatiens this spring. This time I'll probably start both the coleus and double impatiens cuttings in mid-to-late February. I'll let you know how that timing works out! Remember, overwintering outdoor container plants inside is pretty new to me, so I'm still doing lots of experimentation. So far though, I've been very pleased with the results.

A reality of overwintering plants indoors is the potential for pests and diseases. Planning ahead will eliminate or at least help keep these problems to a minimum. There are many methods of reducing and eliminating insect populations - some more environmentally-friendly and safer than others. The internet is a rich source of information on safe, natural, non-poisonous pest controls. Rather than promoting a particular method or product, I recommend doing some research and have a plan for preventing and dealing with any potential infestations. Even simply hosing down the foliage with a fairly strong shower on the tops and undersides of the leaves is helpful in removing many pests. It may take some experimentation to find method(s)/product(s) that work for you.
sweet potato vine overwintered last year


Knowing what they say about an ounce of prevention, you may want to thoroughly clean your plants and the surface of the soil before bringing them inside. Rushing plants indoors the evening before a predicted frost can be a recipe for bringing outdoor pests inside.

Finally, plan to spend a little time on routine maintenance and sanitation practices to keep plants healthy once indoors, and pests at bay. Basic sanitation practices for indoor plants can include an occasional lukewarm shower for the foliage, remembering to pay attention to the undersides of the leaves, removal of spent foliage and/or blooms from plants and soil, and sound watering practices, especially avoiding overwatering. Overwatering can lead to fungus, disease, and rot, and also can lead to pests, especially fungus gnats. Using sticky traps to both detect and control potential pests can be especially helpful, as is careful observation of your overwintering plants and knowing what to look for.

This series is inspired by Rose at Prairie Rose's Garden, who asked me if I'd post some tips on overwintering annuals. In the third post of the series I'll discuss a few more tips for overwintering and propagating plants indoors. In the meantime, I invite anyone who also overwinters tender plants indoors to add your own tips, expertise and experiences to the mix, either in the form of a post of your own, or comments here, or even better, both! A gardener's budget can be dramatically stretched by overwintering tender plants, and even propagating some of them over the winter.

double impatiens cutting started last spring in the basement.

Wednesday, September 24, 2008

Overwintering Tender Plants, Part I

Rose from Prairie Rose's Garden asked me if I'd do a post on overwintering annuals. I'm happy to oblige Rose! Last year was the first time I did it. I'm glad to share what I learned. In order to keep this post from becoming too long, I'll break it into three parts. This one will be background on why I unintentionally ended up becoming a winter gardener during the freezing winters of zone 5a. The second and third parts will be what I do with my plants and how I do it.

When I was a kid and even as a young adult, I had lots of houseplants. I loved experimenting with propagation, and shared and traded many babies. Once I had my own home and a garden of my own, I lost interest in houseplants. I gardened outside so extensively, I looked forward to and enjoyed the winter break from caring for plants and gradually got rid of most of my houseplants.

Until moving here I was never big on container planting. One Christmas my husband signed me up for a plant-of-the-month club. A few of the plants I received were tender in our climate, such as gardenia, hibiscus, and calla lilies. I kept them inside the first winter, then put them out on the patio for the summer.Since the garden here is fairly large and was virtually unplanted when I moved in, I decided to go for some annuals in containers as a way to add some instant, cheap color, although I'd never been 'into' annuals before. In the quantities and sizes I purchased them, it became expensive. After being 'downsized' out of my corporate job a couple of years ago and not going immediately back into the workforce, I decided to slash my annuals budget.

Working part-time at a nursery for the first time last year, I found and purchased tender plant temptations at every turn. By the end of the season I was thinking about indoor gardening again for the first time in many years. I decided to overwinter as many of my tender plants as possible.
In the next two posts in the series I'll talk about how and what I overwintered and what I learned doing this for the first time last winter.